An Engraving Layout Method
An Engraving Layout Method
Every so often I’m asked the process of how I transfer my engraving patterns onto the metal to be engraved. I almost always draw a pattern on paper before any engraving begins, although on very rare occasions I’ll draw directly on the metal. I feel it gives me more control of the final engraving balance and quality.
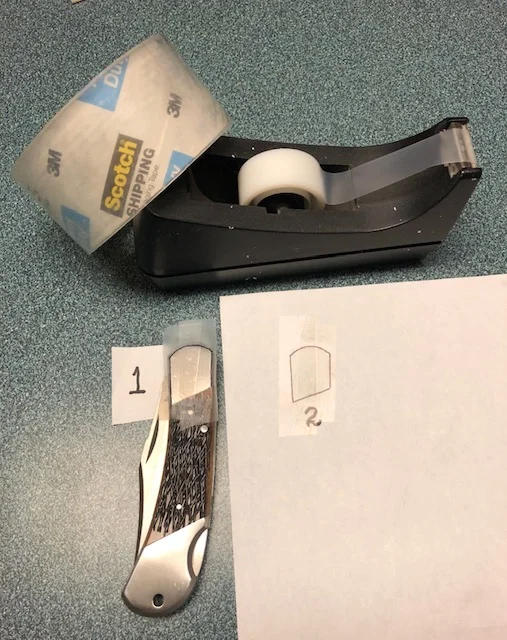
My first step is to create a perfect spatial image to work with. I take either regular Scotch tape or Scotch shipping tape and place it onto my object, in this case, a Kershaw knife. Using a felt tipped pen, I trace the knife bolster outline, and also any holes, lettering, factory stamps, etc., that my pattern will need to fit around. See image 1. In image 2, you see I’ve removed the tape and placed it on a piece of regular 8.5”x 1” printer paper.
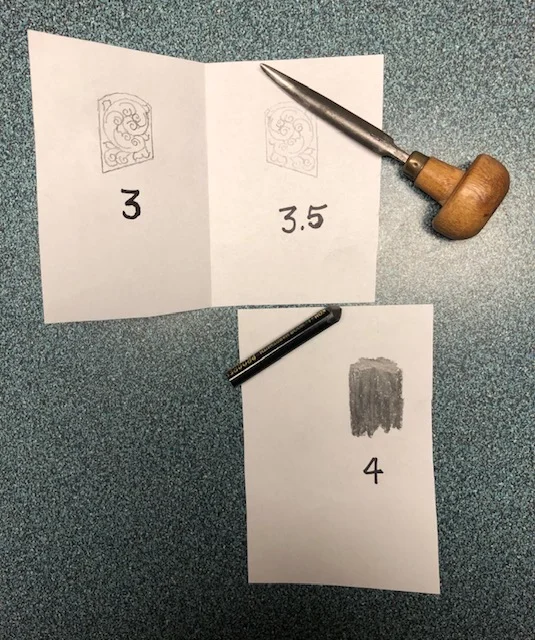
I use a homemade light box to trace the knife outline on another sheet of paper, then draw the pattern using the outline as a guide. See image 3.
Often an item to be engraved has two sides that are the same. Thus, it would be useful to simply reverse the pattern just created. Back in the 1990s, an image reversal took a few seconds on the average PC. Not any more. Irritatingly, a reversal on my PC takes multiple steps these days. Here’s my quick way to accomplish one without using it. Folding the paper over (or using another sheet), I use a burnisher to rub over the back of the image briskly and with heavy pressure. Image 3.5 shows the result of a few seconds labor.
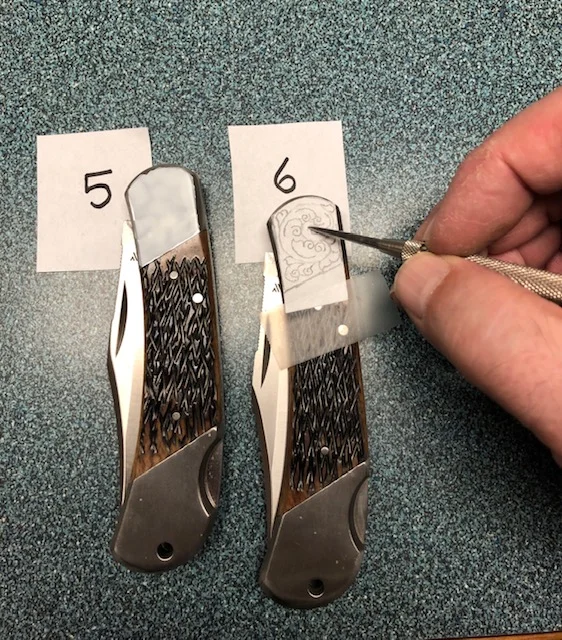
In image 4, I have taken a soft lead pencil and covered the back of the pattern. This creates a very positive carbon coating that will be transferred onto the engraving piece. Image 5 shows that I have coated the knife with white layout fluid.
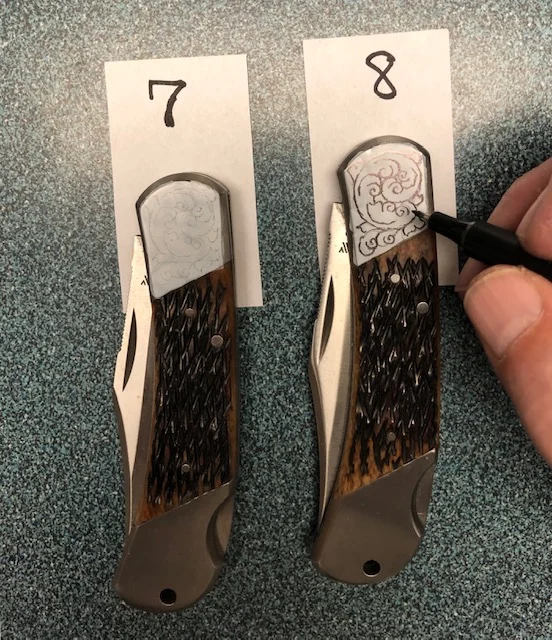
In image 6 I have now taped my pattern onto the knife, carbon side down. Using a dull scribe, I follow the pattern lines, pressing firmly, which leaves a rather fragile carbon image on surface of the white layout fluid. If very careful I could begin engraving at this point. See image 7.
There are two reasons why I don’t. First, as I follow the pattern with the dull scribe, it is very easy to move from one side of the pattern line to the other. While this wouldn’t seem to be much, it really is. Vary a line .010 from one side to the other, and it will look like a child in kindergarten drew it. It’s much easier to cut close to an accurate line than it is to correct that same line with a graver. Secondly, any touching of the carbon image will instantly smear it. If I’m engraving a large enough pattern, it’s easy to literally erase it with my hand as I cut. I could spray it with an artist fixative, but then I would have problems of removal.
So…., I add another step. In image 8 I use a very fine black marker to true up the carbon lines. This makes the pattern now smudge proof.
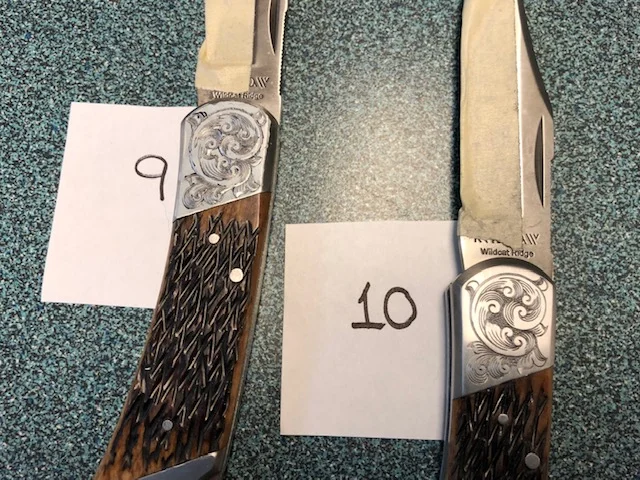
Image 9 shows how things look after I have engraved the pattern through the layout fluid and lines.
Finally, in image 10 I have removed the burrs thrown up by the graver and used a dot punch on the background. This knife bolster is now complete.
A number of different layout methods exist, and on occasion I will use them instead of this one. Each one will have its own set of problems. Some are superior on a particular job. I keep looking for the perfect method which is fast and accurate, works every time in all situations, but I haven’t found it yet.


